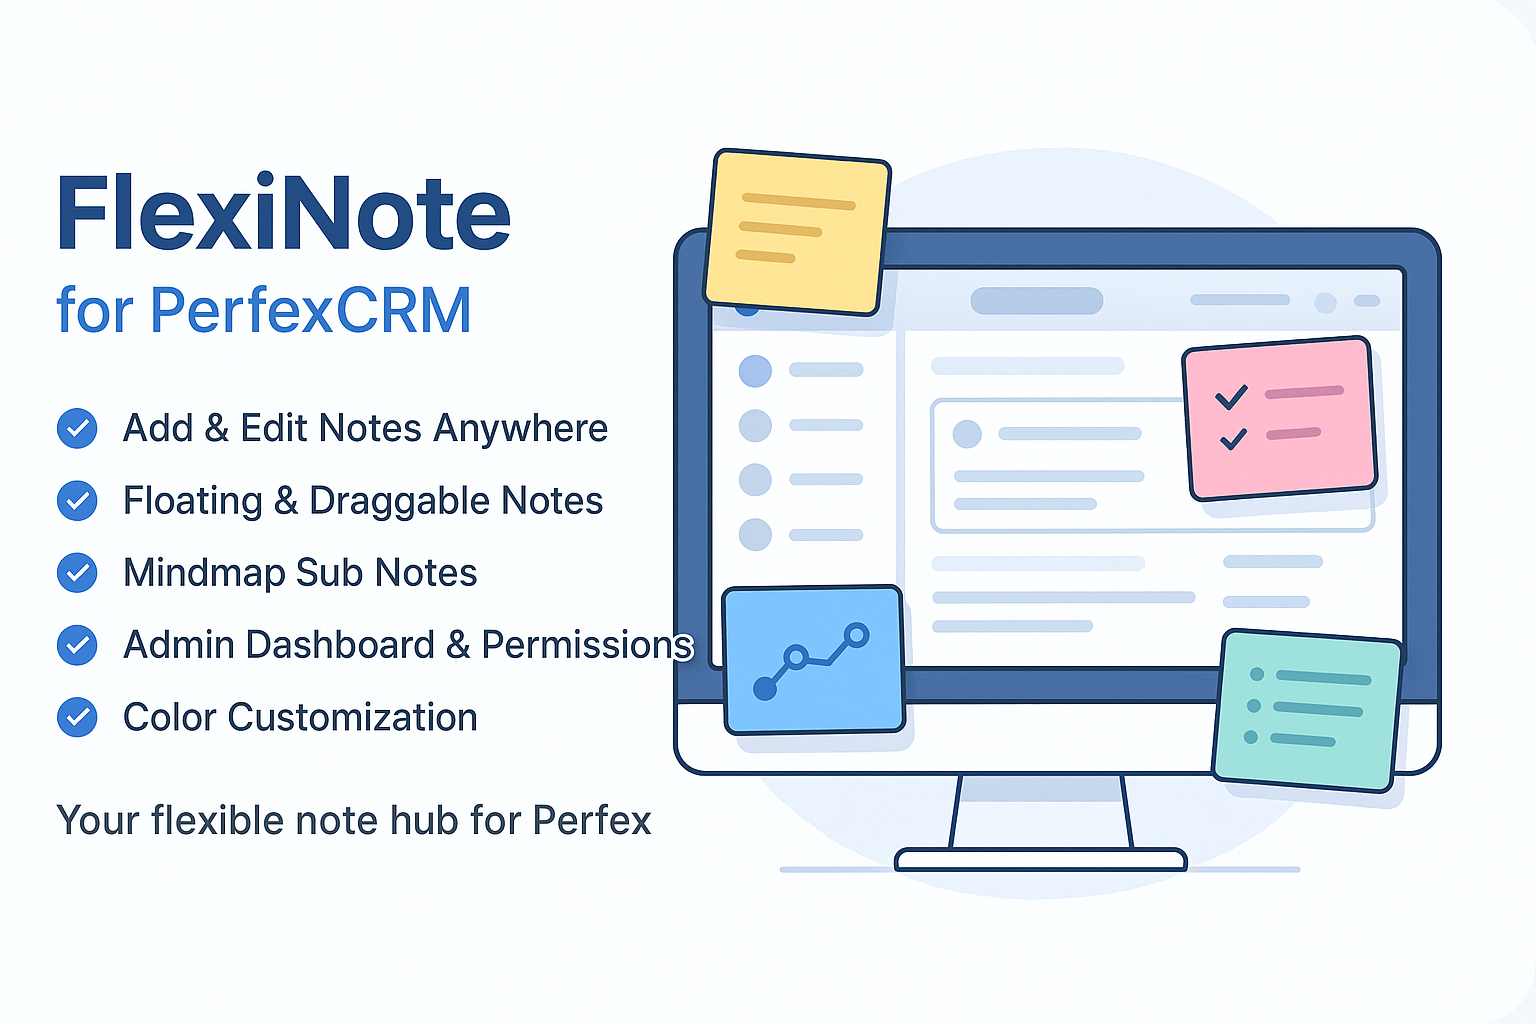
FlexiNote for Perfex CRM extends note-taking capability inside Perfex CRM. Staff can create and manage personal notes instantly from any admin page. Notes attach to pages such as Projects, Orders, Tasks, Tickets, Invoices, Payments, Modules, or Settings, so critical information appears every time a new session starts. Workflow becomes faster, more consistent, and more efficient.
…Demo of PolyUtilities features:
Site: https://flexinote.polyxgo.com/admin
Video Demo for FlexiNote
Upload & active module
Steps of Installation
- Extract your downloaded file contens. You will notice a folder called “documentation” and a new zip file, called “flexinote.zip“.
- “flexinote.zip” contains the module files (in a module format) that you upload in Perfex CRM’s Modules installation section.
- Go to your Perfex CRM’s Admin area and select the following menu item: SETUP > MODULES.
- Select the extracted flexinote.zip at Module installation selection prompt and press INSTALL.
- Find the module named FlexiNote and click Activate. You will be told that module is successfully activated.
Now you can begin using the module by accessing the menu named FlexiNote.
Core Features & How-To Guides
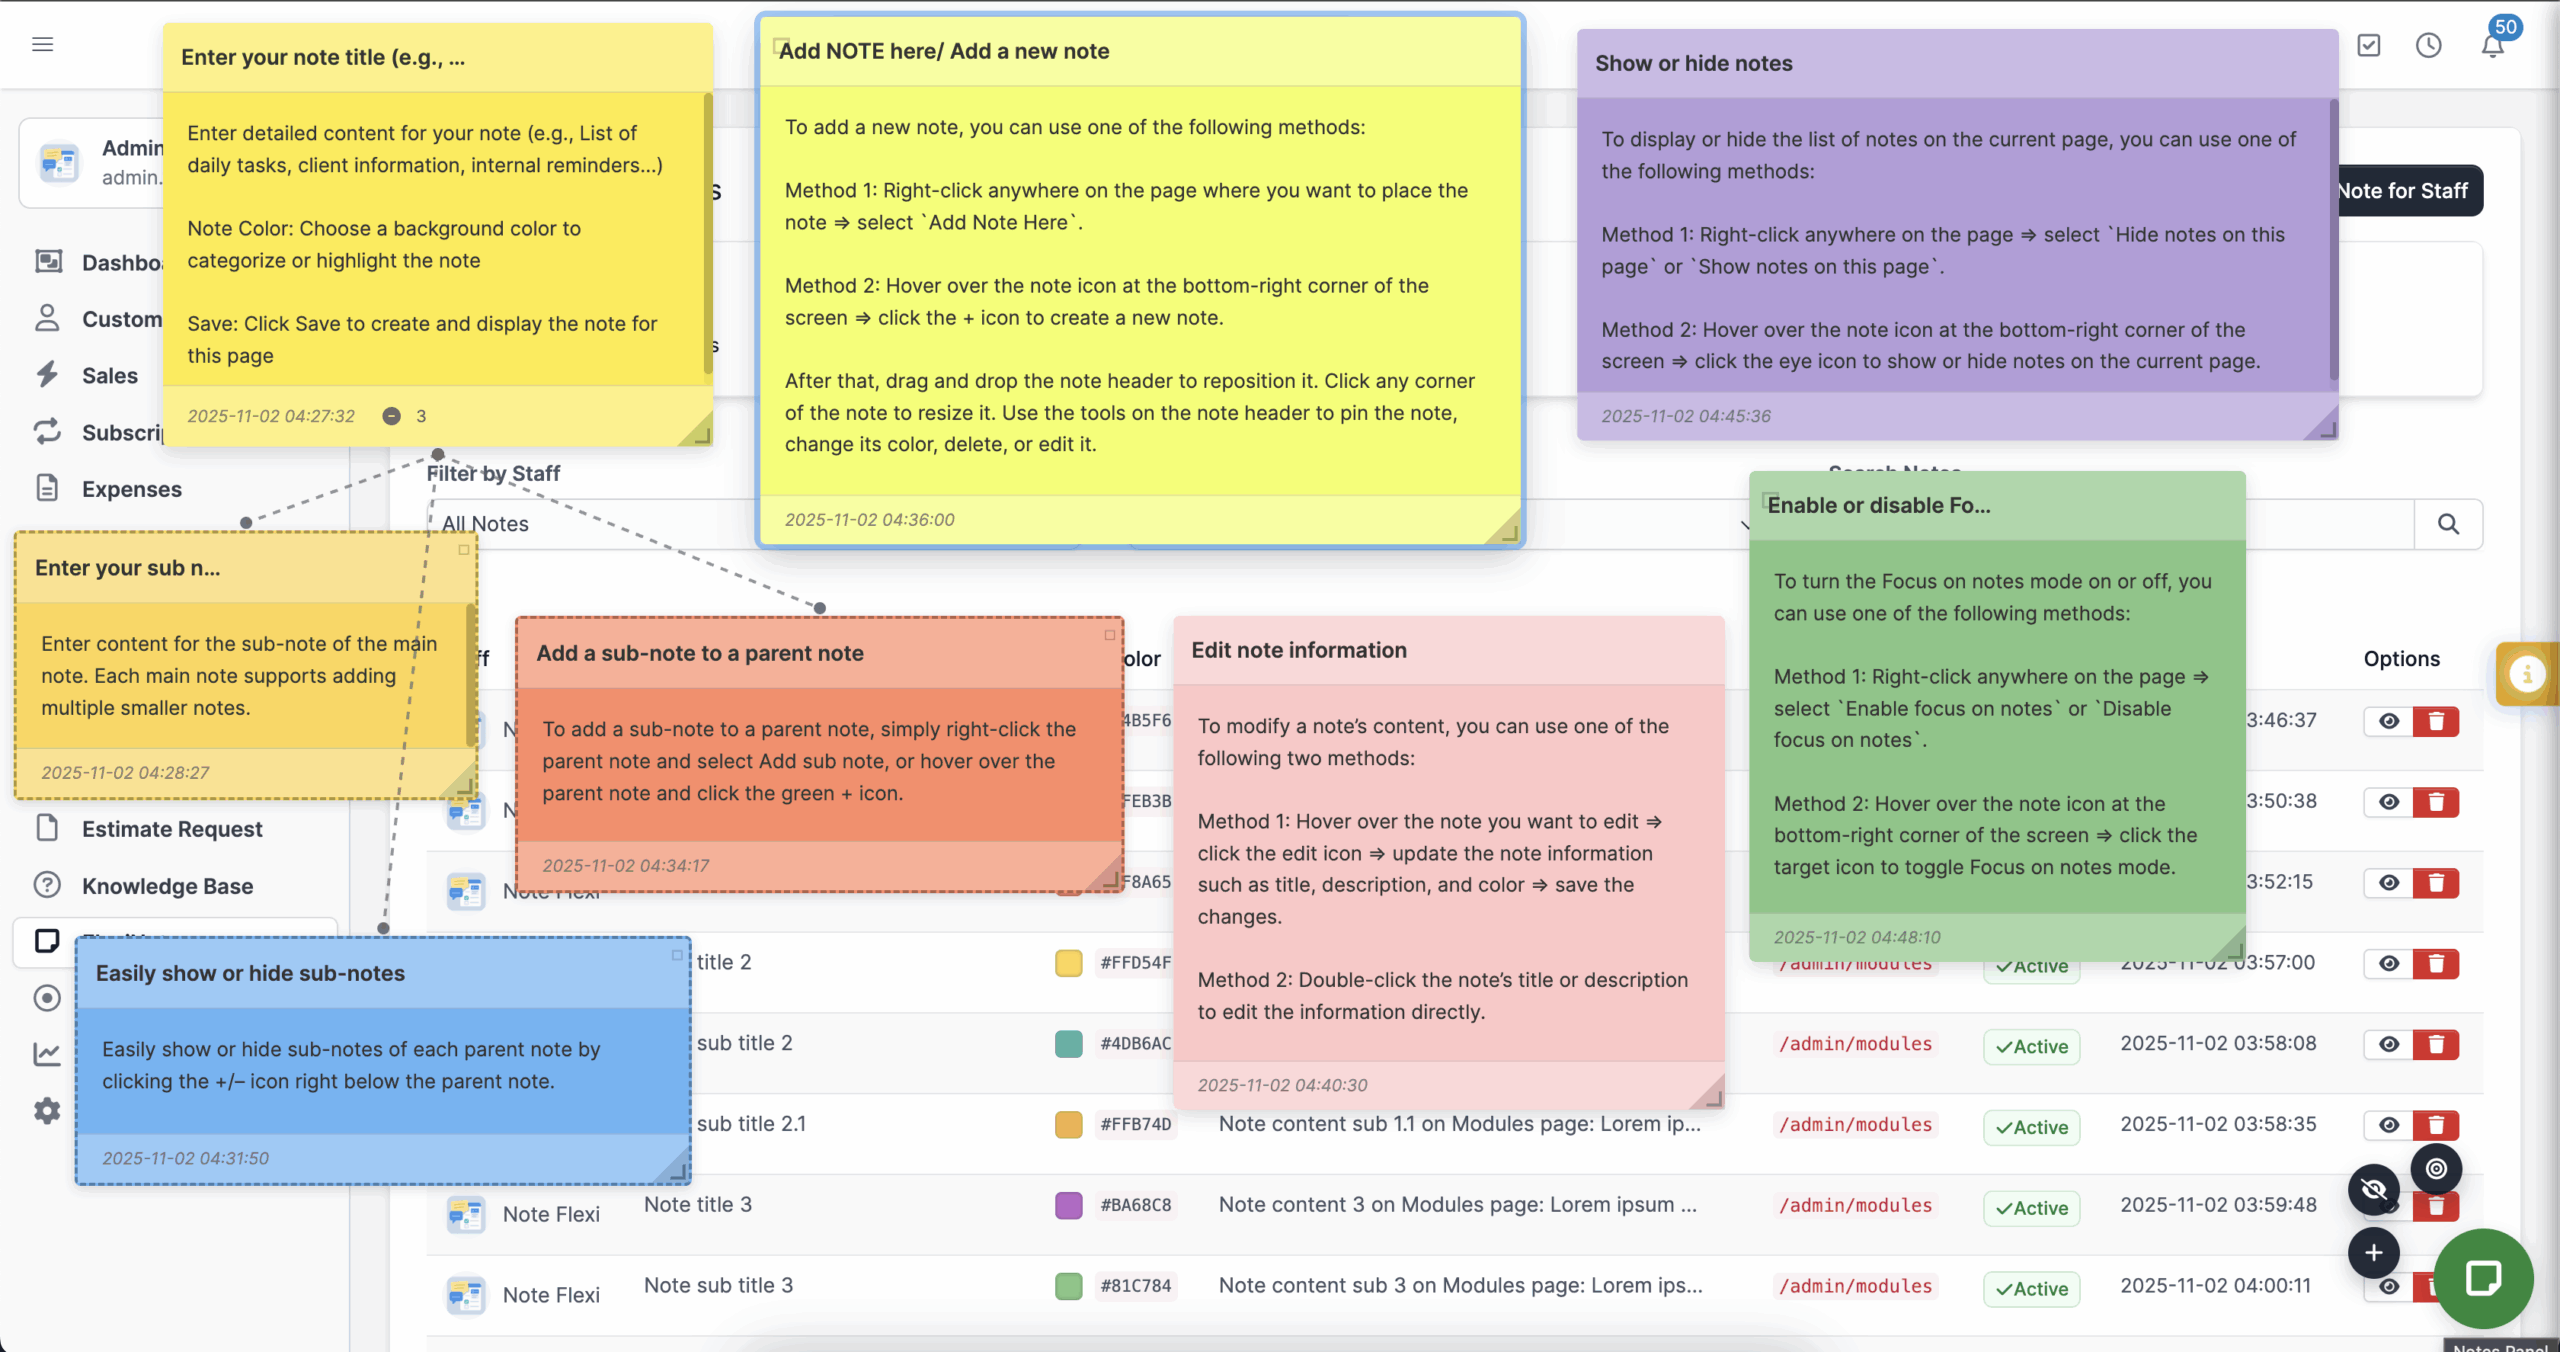
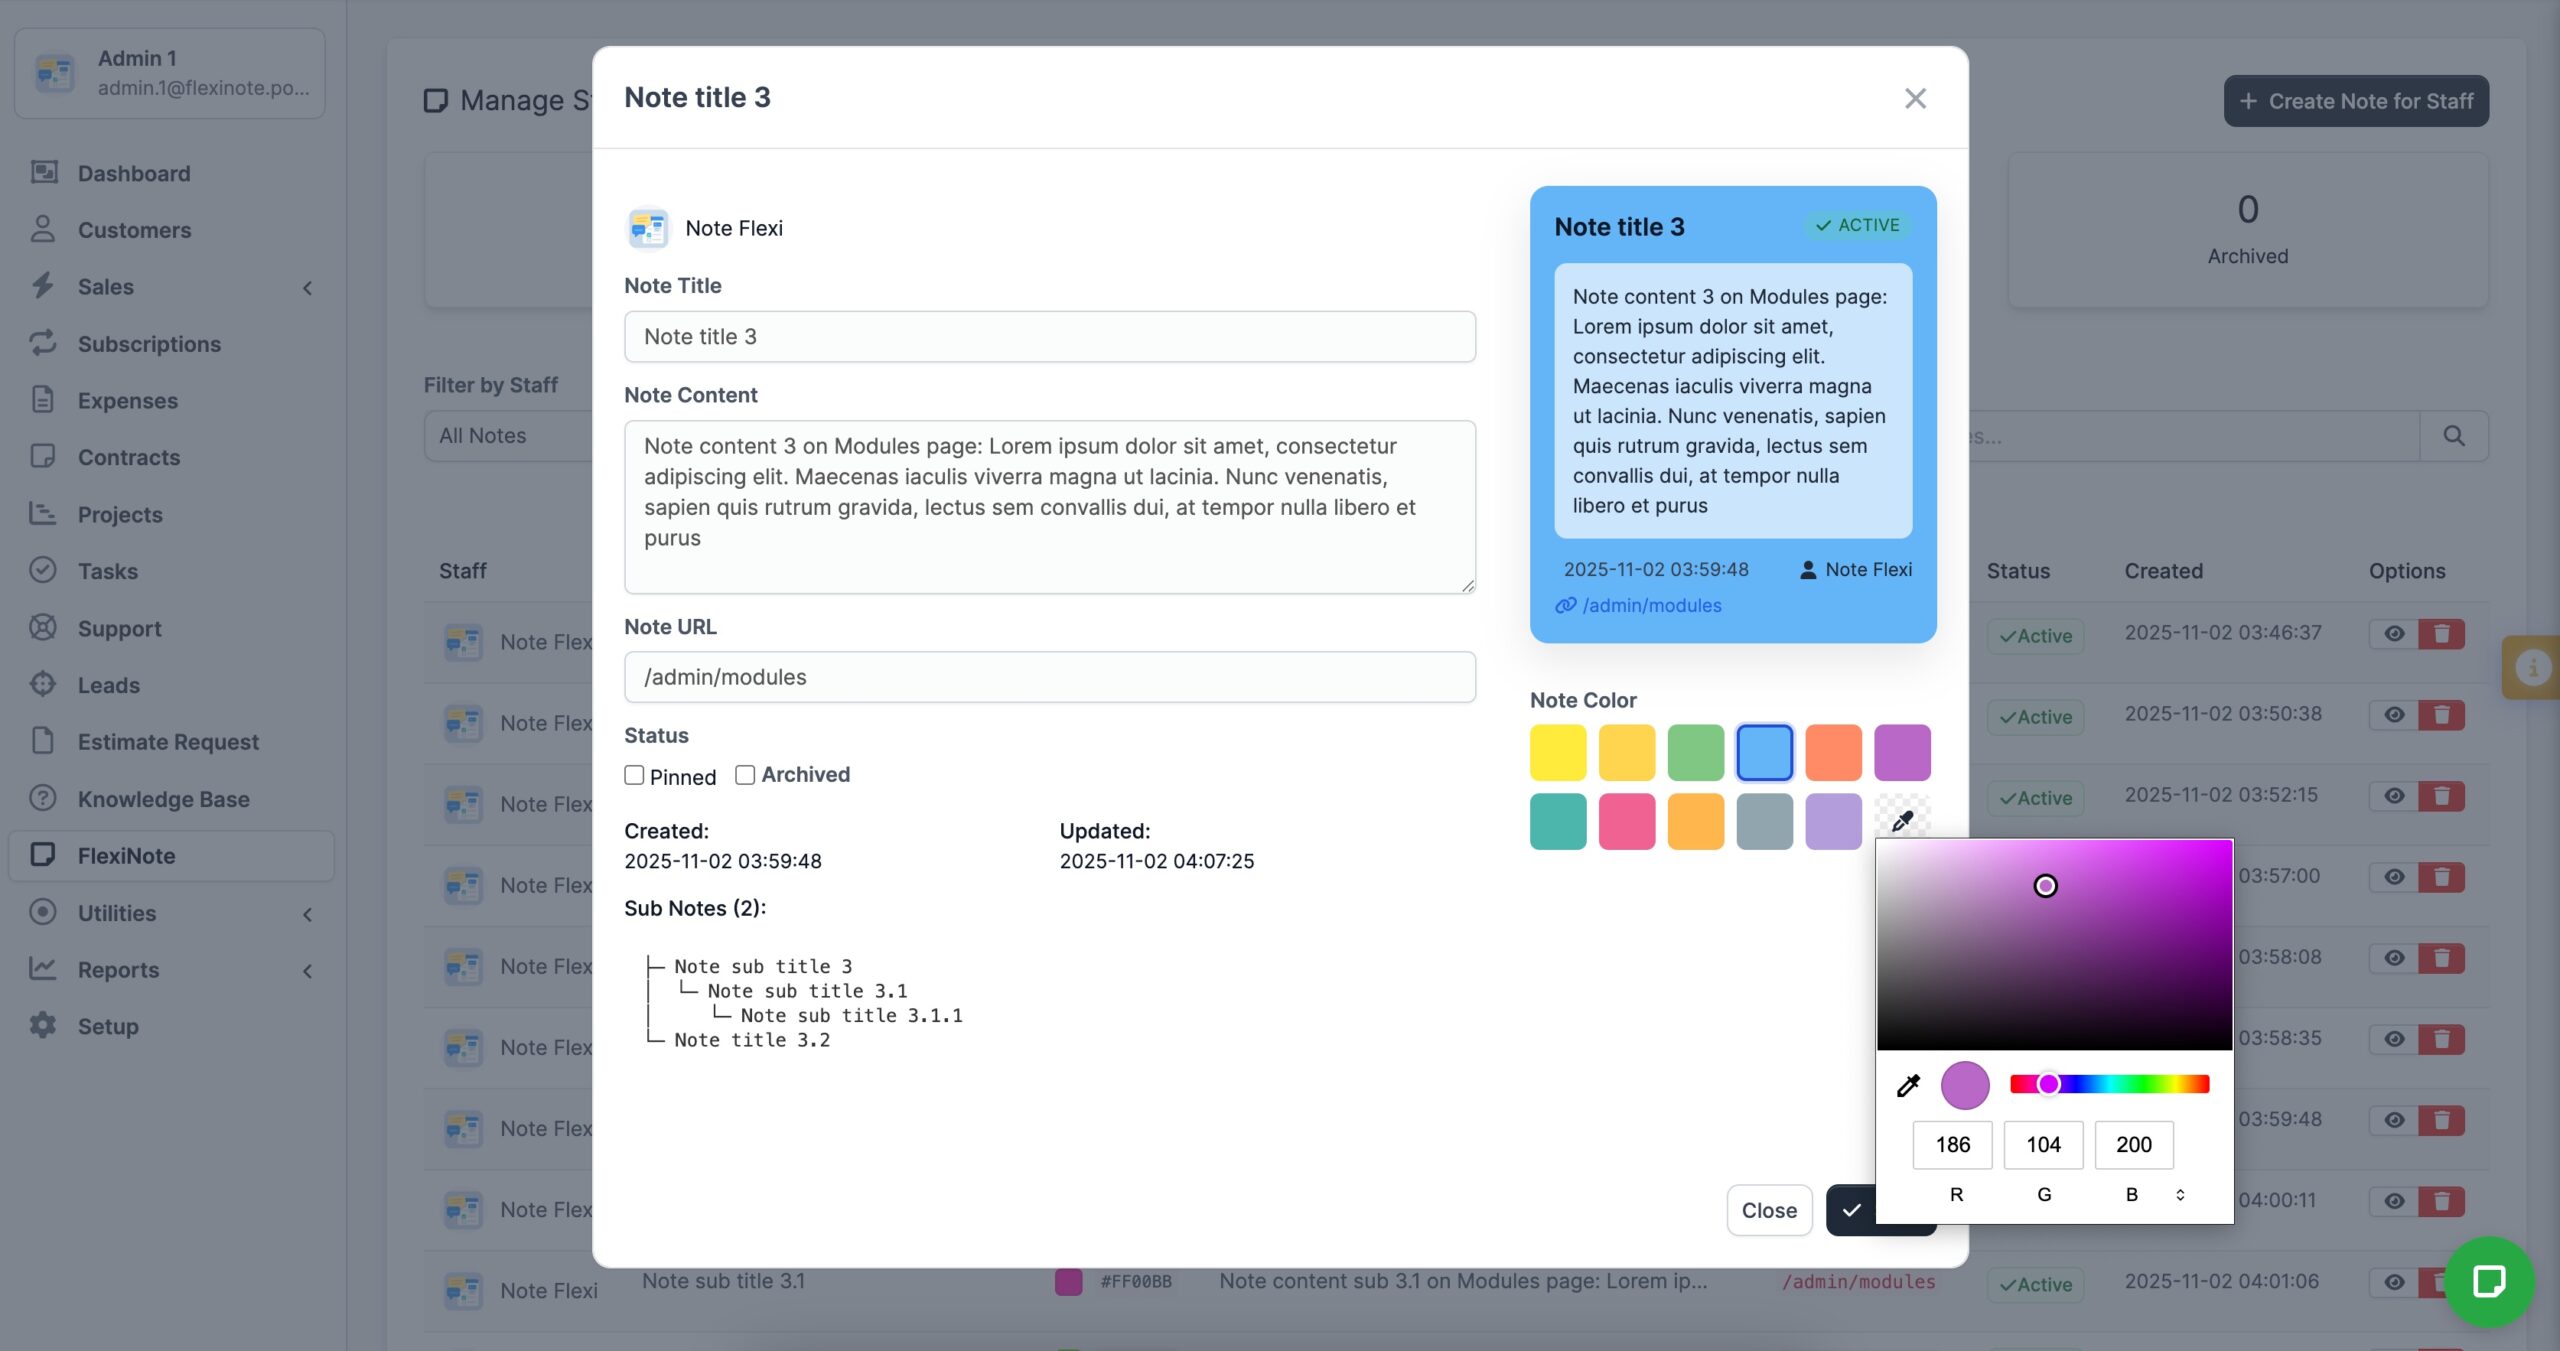
1. Add Note
- Navigate to any Perfex CRM admin page where you want to store context.
- Right-click the area or click the floating FlexiNote toggle and choose Add Note.
- Enter a title, write the content, optionally assign a URL, and press Save.
- Edit any existing note by clicking the pencil icon, update the fields, then save again.
2. Floating & Draggable UI
- Hover over the note header until the drag cursor appears.
- Click and drag to reposition the note anywhere on the page; FlexiNote saves the coordinates automatically.
- Resize the note by dragging the lower-right corner; use the hide/show toggle to declutter the view.
- Repeat per page to craft a custom layout that follows your workflow.
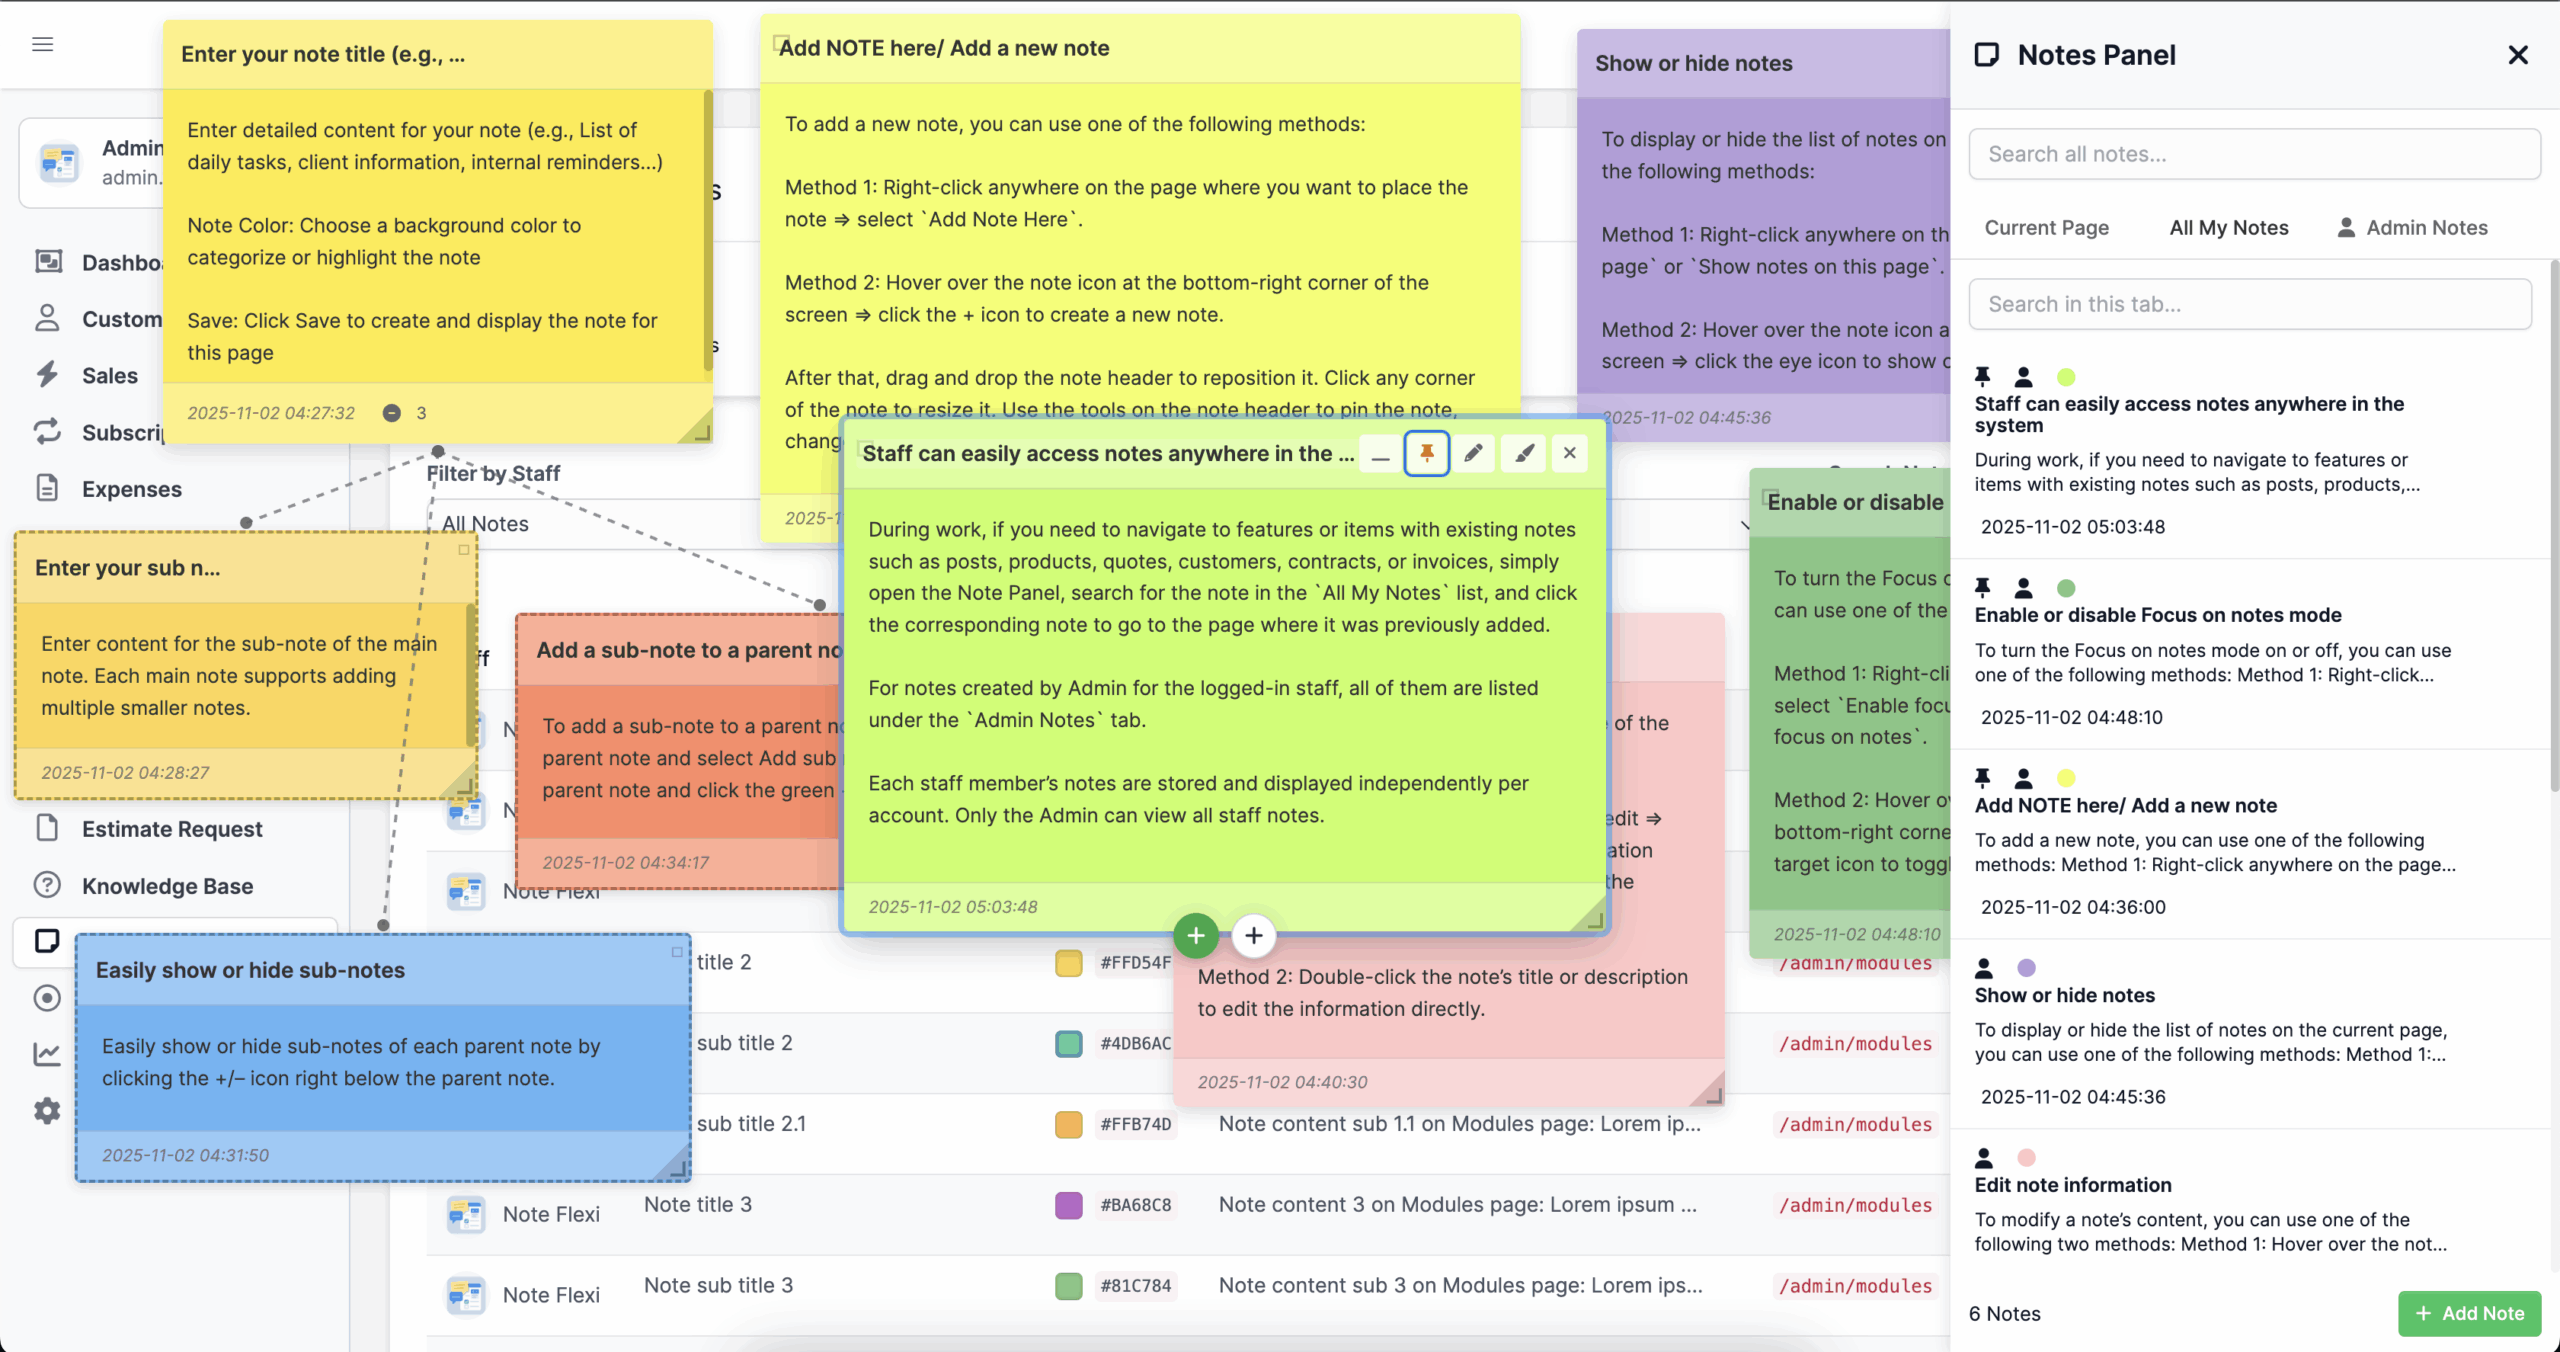
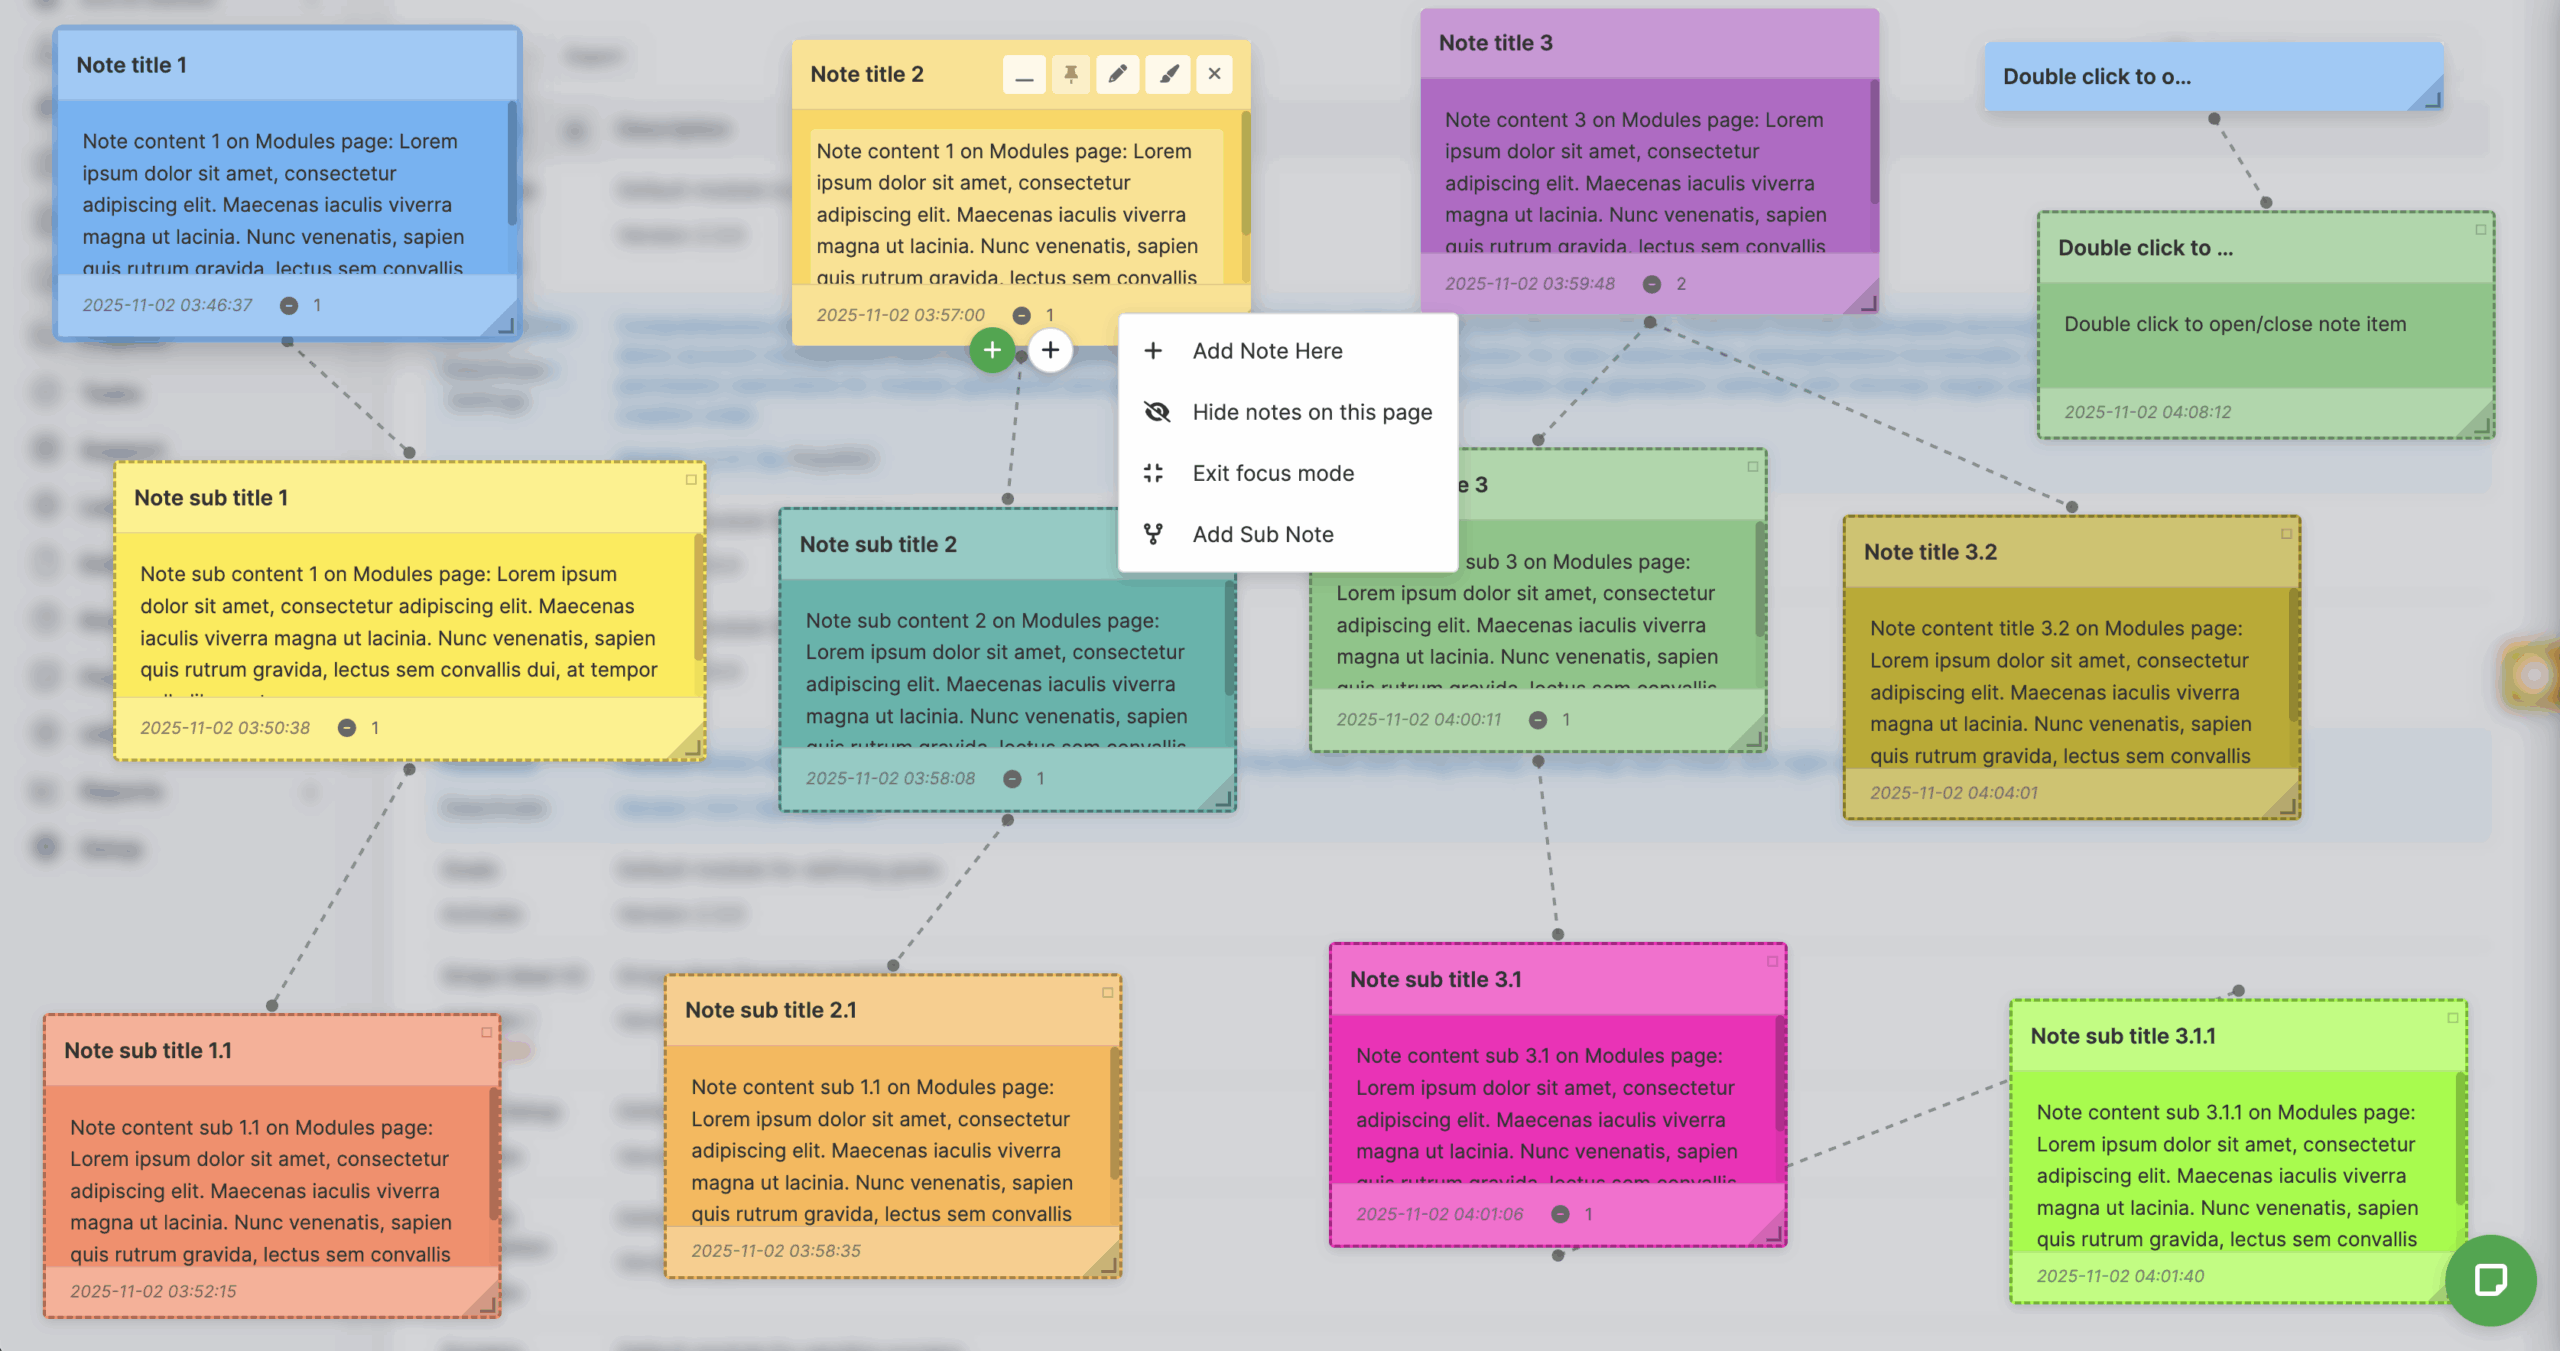
3. Mindmap Sub Notes
- Hover over a parent note and click any available + icon to choose a direction.
- Fill in the sub note details; FlexiNote links it visually with connection lines.
- Use expand or collapse controls to navigate up to 8 depth levels without losing context.
- Drag sub notes to reposition within their assigned quadrant if needed.
4. Panel Notes
- Click the FlexiNote panel toggle to open three tabs: Current Page Notes, All Notes, and Admin Notes.
- Search within a tab or use the global search to filter across every note.
- Select any note in the list to jump directly to its page with focus mode enabled.
- Use the tab counters and filters to keep track of pinned or archived notes.
5. Expand/Minimize & Pin to Top
- Click the minimize icon on a note header to collapse it into a compact bar.
- Press the expand icon to restore full view when you need the content again.
- Use the pin icon to keep high-priority notes at the top of panels and page stacks.
- Combine pinning with panel filters to spotlight critical reminders during sessions.
6. Color & Layout Customization
- Select the palette icon inside a note to choose from curated FlexiNote colors.
- Resize width and height to match the amount of detail you want to display.
- Arrange notes by importance on each page, then confirm the layout by clicking elsewhere so auto-save runs.
- Return later to adjust the palette or layout as project priorities shift.
7. Context Menu
- Right-click any open area to launch the FlexiNote context menu.
- Choose Add Note Here or Add Sub Note without leaving the cursor position.
- Use toggles to show or hide all notes on the current page or activate focus mode.
- Press Esc to close the menu instantly when you are done.
8. Language Coverage
- Navigate to Perfex CRM language settings and enable any of the supported locales.
- Reload the admin area—FlexiNote automatically displays the correct translations.
- Switch languages at any time; note content remains intact across locales.
Collaboration & Control
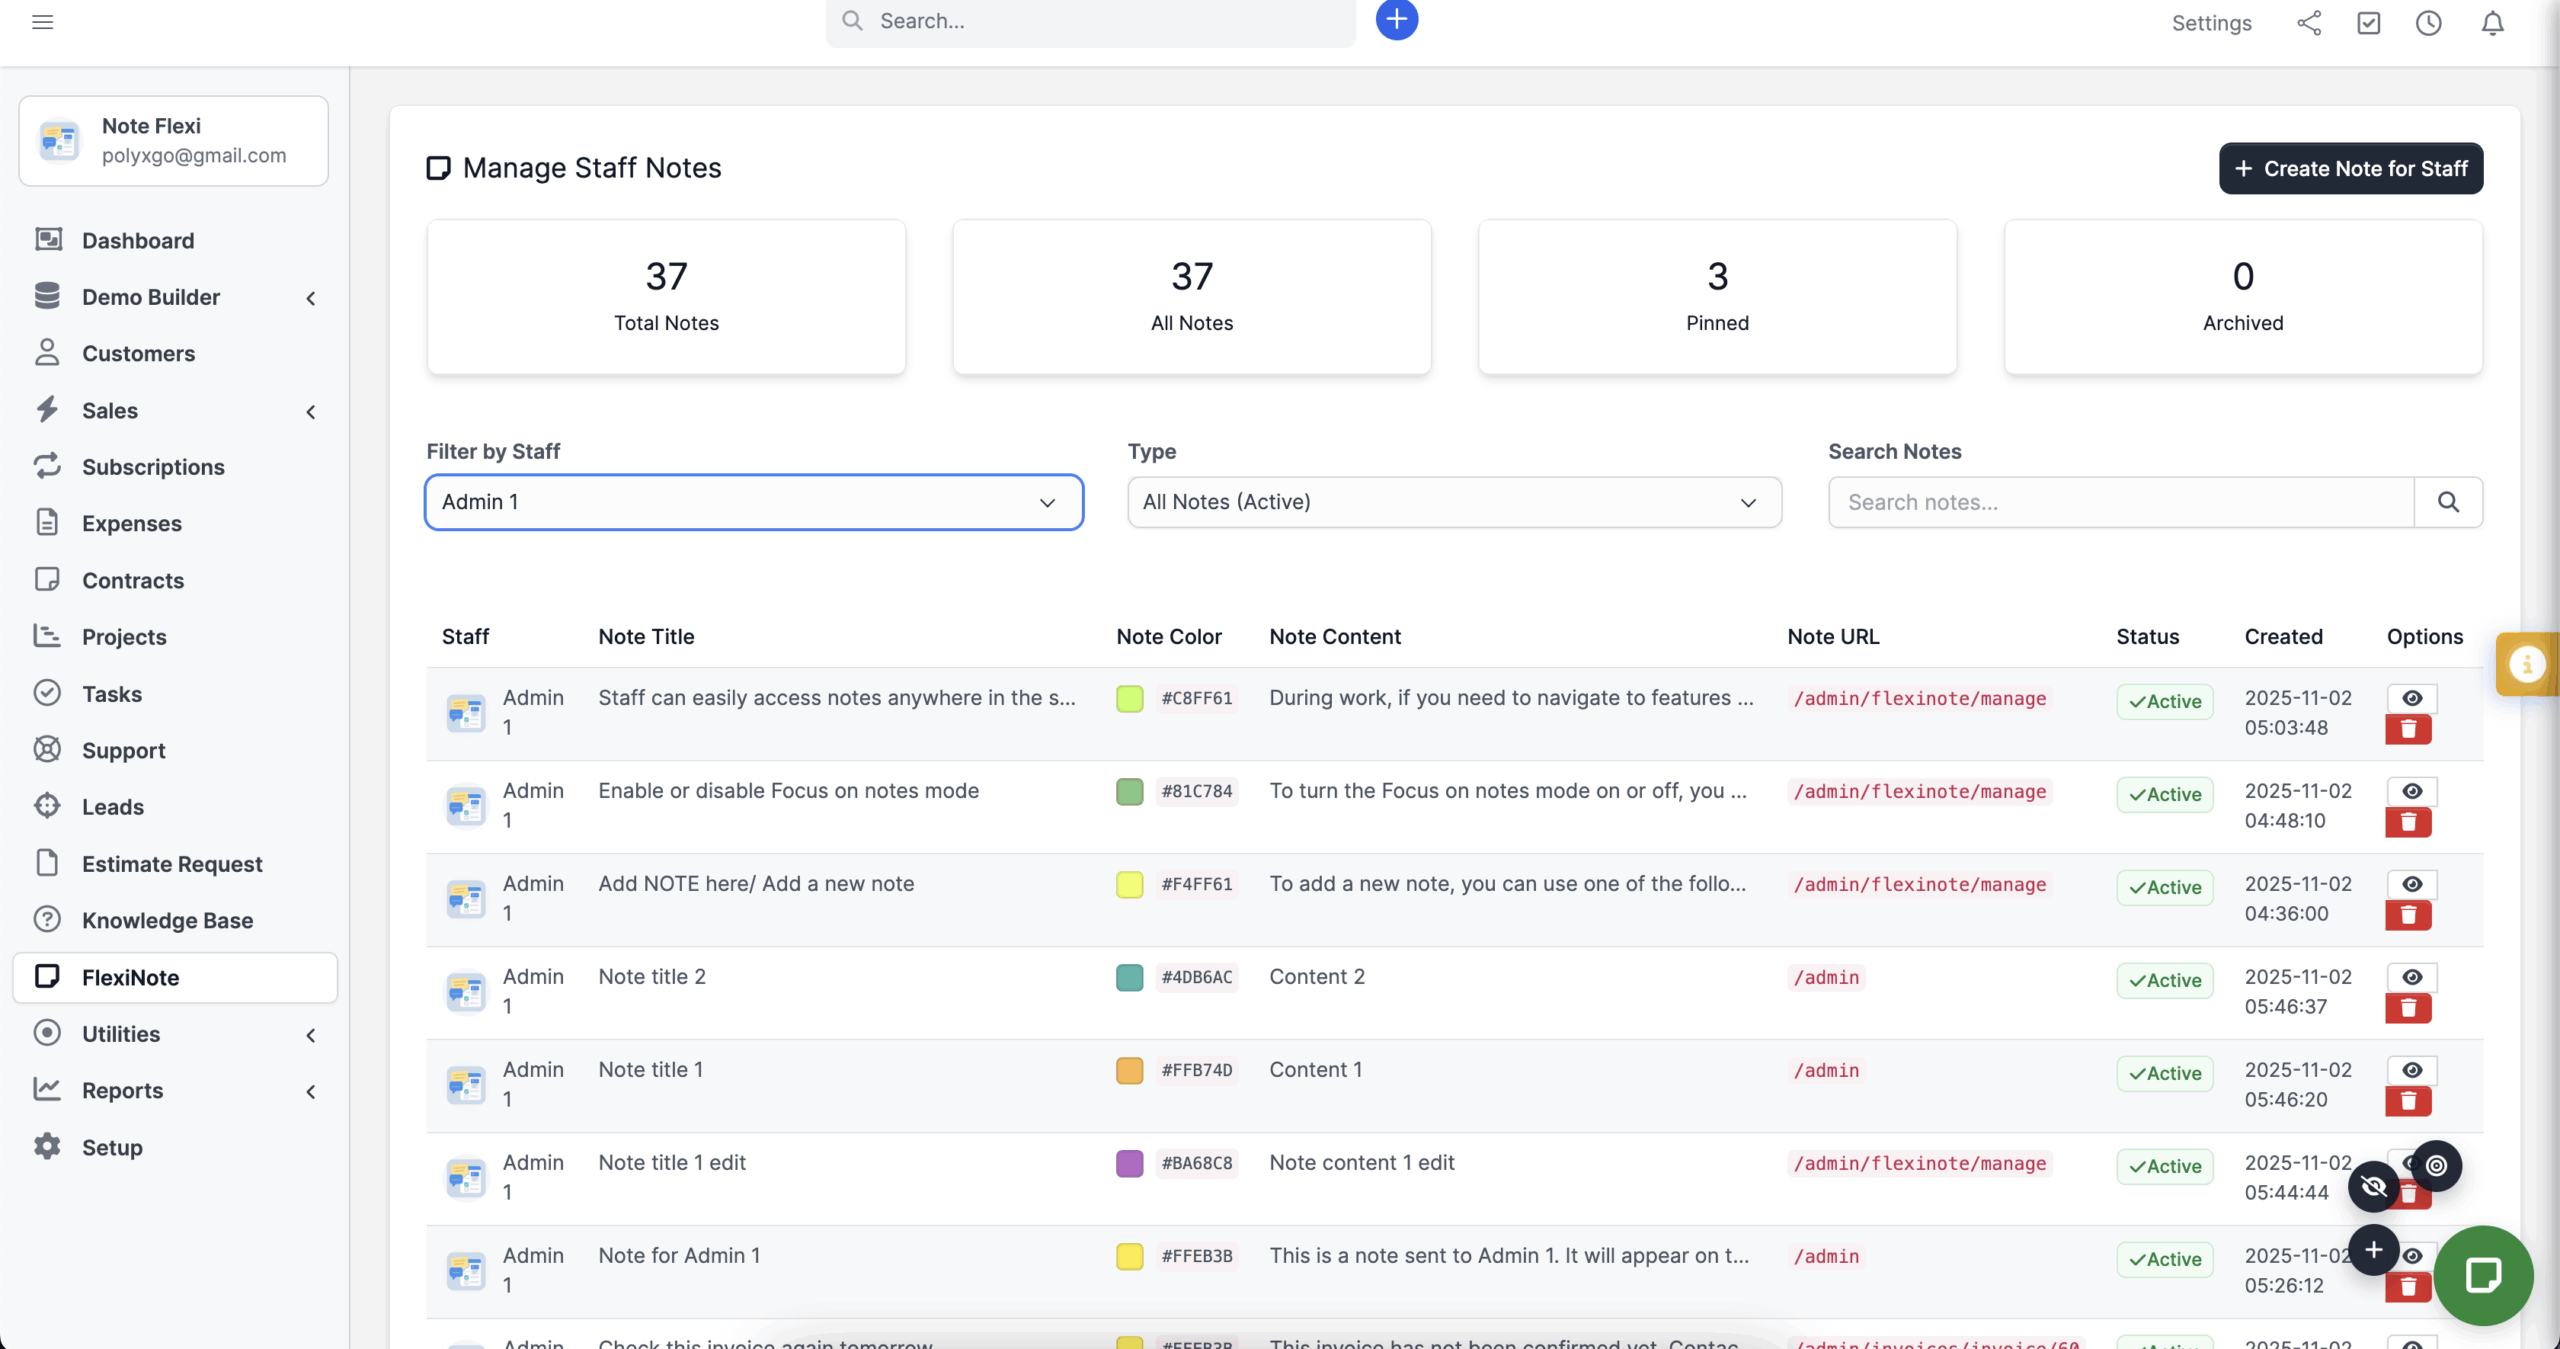
Admin Dashboard
- Open FlexiNote → Manage Notes to review system-wide statistics.
- Filter by staff member, page URL, or note status to identify activity trends.
- Click any listed note to audit content or remove outdated information.
Permission Control
- Go to Setup → Staff → Roles and assign view, create, edit, delete, or manage permissions.
- Limit sensitive capabilities to trusted roles while allowing everyone to view their own notes.
- Test role changes by logging in as a staff member to confirm the desired access.
Admin Notes
- From the admin dashboard, choose Create Note for Staff and pick the recipient.
- Assign the target page (for example,
/admin/clients) and enter the secure message or instructions. - Save the note; staff see the admin badge and read-only banner immediately on their dashboard.
- Update or delete the note later to keep shared knowledge fresh.
Documentation & Support
The downloaded package includes a complete installation guide and feature documentation so you can configure FlexiNote quickly.
For assistance, submit a support ticket through the Codecanyon comment section. Our team responds as soon as possible with detailed guidance.
Leave a Reply